Pages

Showing posts with label bake. Show all posts

Sunday, May 20, 2012

Recipe Test: Red Velvet Shortbread.

Recipe Test:  Red Velvet Shortbread.

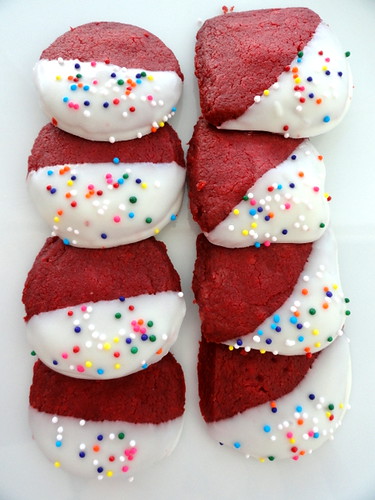
Better Homes & Gardens has a recipe for Red Velvet Shortbread,  but it has eggs and I wanted something more along the lines of a regular shortbread without the eggs.  So I took a chocolate shortbread recipe (confectioners sugar, flour, cocoa powder, salt and butter) and reduced the cocoa powder. Then I mixed together some vanilla bean paste, Super Red gel paste color and a bit of white vinegar to make the whole 'red velvet' thing official. 

These are okay in a sweet buttery cookie kind of way, but I still need to do some tinkering.


DSC02081

Sunday, May 13, 2012

Rhubarb Bars.

Rhubarb Bars

I'm a big fan of rhubarb, but unfortunately it costs an arm and a leg in the city so I get to make something rhubarb maybe twice during the season.  These little cookie bars were pretty good.  I made half with nuts, half without.  Next time, I'll lose the nuts.  I think the bars are better without them.  And I'll probably up the rhubarb to 2 1/2 cups.


Rhubarb Bars
Yield:  18-20 bars

Oven to 350.
Line a 9" square pan with parchment.

For Crust:

1 C flour
1/3 C confectioners sugar
1/2 C butter, softened
1 tsp cinnamon

In small bowl of stand mixer with paddle attachment, stir together crust ingredients until it forms a dough.  Press dough into parchment-lined pan. Bake for 15 minutes.

For Filling:

2 eggs
1 C sugar
1/4 C flour
1/4 tsp salt
1 tsp vanilla bean paste
 2 C thinly sliced rhubarb (about 2 stalks)
1/2 cup chopped pecans (optional)

Whisk together eggs, sugar, flour, salt and vanilla bean paste.  Fold in rhubarb.  Spread filling over hot crust.  Top with nuts, if desired.

Bake 35 minutes.  Cool in pan on rack.  Cut into bars. 

Note:  To make cutting easier, dip your knife in hot water.

Rhubarb Cookie Bars

Monday, April 16, 2012

Apricot Pecan Sourdough Bread

Apricot Pecan Sourdough Bread

It looks pretty good but in all actuality it was a fail. I think I waited too long after the overnight rise to shape the boules. The final rise was a dud and the loaves baked up kind of dense.

Sunday, March 11, 2012

Chocolate Sourdough Bread.

100% hydration starter

100% hydration starter

doubled in 3-4 hours

doubled at 3 1/2 hours

My formula is a combination of this one and a few tips from Peter Reinhart's The Bread Baker's Apprentice, which was recommended to us at bread school. This means I had to do my own baker's math. I don't want to tell you how long it took me to figure it all out.

Formula:

12.00 oz Bread Flour [100%]
4.23 oz Starter [35%]
.18 oz Salt [1.5%]
7.41 oz Water [60%]
4.81 oz Chocolate [40%]
.38 oz Cocoa Powder [3%]
.88 oz Sugar [7%]

I ended up using only 3.81 oz of the chocolate and I needed to add a bit more water.


The dough doubled in 12-14 hours on top of my fridge.

chocolate sourdough: proofed to double

Nice and gassy and it smelled so good!

gassy

Turn the dough out onto floured surface

pouring the proofed dough out onto floured surface

Stretch it into a rectangle and add the chopped chocolate in a series of folds (4 folds total)

adding the chopped chocolate (4 folds)

Shape into a boule and place in a mixing bowl lined with a well-floured couche. Proof at room temperature about 4 hours. Heat the stone in the oven to 450 deg.

boule in bowl

I got a lame from Breadtopia (great price and they shipped really fast), but unfortunately, you won't be seeing how much better my scoring is this time around. Even though I floured the couche really well, the boule stuck to it anyway and I had to pry a big chunk off the cloth which messed up the top and deflated the loaf. Sigh.

DSC01872

I baked it off anyway with a steam pan and spraying the walls with a mister for the first 3 minutes of baking.

DSC01895

And even though it's missing some off the top, I still think it's gorgeous with its dark, chewy, floury crust. I've never had chocolate sourdough before now, and it's a winning combination. The 2 flavors go together so perfectly. I'm definitely going to do this bread again and work on perfecting my technique for getting the boule out of the bowl.

chocolate sourdough crumb

Sunday, February 26, 2012

First sourdough bake off.

1st sourdough loaf

I feel pretty good about the results, although I'm already contemplating next steps and how to improve going forward. For one thing, I really blew it with the scores. Scoring the dough before it hits the oven directly relates to how the loaf is going to expand in the oven. The sharpest blade in my kitchen is an Xacto knife and it wasn't sharp enough to do the job properly. I need to get a proper lame.

But my starters are definitely on their way. The crumb was really tender albeit not hole-y enough yet. The crust was chewy and the taste was medium-sour and yeasty. All in all, really good.

crumb

sourdough

DSC01820

Saturday, February 25, 2012

The first sourdough loaves.

I've been nudging my sourdough starters along for the last month or so. It was a little touch and go there between week 2 and 3 because I didn't see much growth. They were, however, bubbling away and smelling very yeasty and sour.

They get fed twice a day and because my kitchen is quite chilly, I started putting the jars on a heating pad with towels around them for about 2 hours after their feedings and then sticking them on top of the refrigerator after that where there is a little more warmth than my counter. This week I finally saw about 1/2" of climb on the walls of the glass jars and while it's not exactly bubbling over, I decided to try to make a couple of loaves with it and see what happens.

Here's the proofed starter, ready to go into the dough mix-

1 1/2 cups proofed sourdough starter (whole wheat)

Mixed with the rest of the ingredients until shaggy. This is allowed to rest for 30 minutes before kneading-

sourdough bread dough - shaggy

Here's the dough after about 10-15 minutes of kneading with a dough hook. It will get another 45 minutes of resting-

knead 10-15 minutes with dough hook

And here's one of the shaped loaves, ready for a night in the fridge-

free form oval loaf prepped for overnight in fridge.

Tomorrow I'll pull them out of the fridge and let them rise. Hopefully they will, and I'll have something to bake.

Sunday, January 29, 2012

sourdough starter.

DSC01680

Despite the fact that our bread instructor at SFBI told us not to forget our sourdough starters in the chiller when the 2-week class series ended, I left my sourdough starter in the chiller. That was about 7 years ago.

Last weekend in one of those -I need to do this random thing that occurred to me right now- moments, I decided to get a sourdough starter going to replace the one I left at the school.

I made 2 starters - whole wheat and rye.

Day 1 (whole wheat)

sourdough starter day 1

Day 6 (whole wheat)

sourdough starter day #6

One week later

whole wheat

whole wheat starter 9 days

rye

rye starter 7 days

They really do have their own personalities. The whole wheat took off immediately, doing its thing and eating me out of house and home and unbleached white flour. The rye started very slowly. At one point I thought it was dead, but on day 6 it sprung to life and now appears to be slightly more active than its whole wheat partner. They're both very healthy and smell like sourdough, which makes me really happy because I have a backup in case one of them goes in the crapper.

At this point, I'm just maintaining them at room temperature with twice-a-day feedings, and I'll keep doing this for another week, at which point they'll go in the fridge for long-term storage.

Sunday, November 13, 2011

Toasted Coconut Shortbread

Toasted Coconut Shortbread

recipe by Smitten Kitchen

I made these for a dinner party and they were super easy and delicious.

To save even more time, I put the dough in a large ziplock bag and flattened it out with a rolling pin until it was an even 1/4" thick. Then you just zip up the bag, put it on a baking sheet and chill overnight in the refrigerator.

To bake - cut open the ziplock bag, turn the dough out and cut it into squares with a knife. Use a fork to pierce the tops of each cookie a couple of times.

Thursday, April 28, 2011

Scottish Bannocks

It's been a little over a month since I gave up flour and white sugar. The first 3 1/2 weeks were cold turkey- totally gluten-free and no white sugar - but now I'm allowed the occasional splurge of flour or sugar.

There were moments during the cold turkey phase when I thought I might kill someone if I didn't eat a piece of bread, but that's passed for the most part and it's really not that bad.

I finally tried one of those gluten-free oat puck things that you see wrapped up in Seran and stacked on the counter at markets. They look like they've been there forever and they taste like it too. I was thinking there has to be a better way with these. So far I haven't come across any kind of recipe for them although truthfully I didn't try very hard because while googling 'oat cake' I came upon a recipe for Scottish Bannocks which are nothing like the stale oat puck.

First, you mix some oats, a tiny bit of wheat flour and some buttermilk or yogurt in a bowl, cover it and let it sit on the counter for 8 hours. I did that this morning.

bannocks dough

When I got home from work this evening, I added melted butter, salt and baking powder to the oats mix and then rolled the dough out with a pin. The dough isn't that sticky so it was easy to roll and I didn't need to use any additional flour. I was able to get 17 bannocks with a 2 1/4" cutter (I just grabbed what looked like the right size from the tin but next time I'll use either a 2" or 2 1/2" cutter).

DSC01347

Bake at 325 for 25 minutes or until golden.

Here they are in all their interesting glory- crispy on the outside and chewy on the inside. The flavor is most definitely earthy and there's a tang from the yogurt.

DSC01362

Serve with honey, jam, cheese or I don't know what else. I'll have to get back to you on that.

They're probably not for everyone, but I can also see how they would be the kind of thing that grows on you which is where I stand at the moment. They're pure in ingredients and oats are excellent for you so I plan on experimenting a little more with this recipe.

Monday, March 07, 2011

Vanilla Buttermilk Cupcakes.

Vanilla Buttermilk Cupcakes

Recipe adapted from here.

I have some serious vanilla paste and this recipe is the best vehicle I've found for it. Something about the buttermilk makes the flavor of the paste really stand out. The recipe is super easy to throw together too.

Monday, February 21, 2011

the low simmer.

Dennis the Menace was here last weekend.  He's planning to move here at some point in the next several months. We don't have an official move date yet, but I'm already crazy over how much will have to be done & the details, details, details of finding a place to live and then moving us both into it, so I'm trying not to think about it too much. How's that going for me? Well, some minutes are better than others but I figure if I can keep the panic at a low simmer I'll be OK.

We drove around various neighborhoods this weekend (in the pouring rain I might add) and even looked at an apartment in this building. This place won't be available for another couple of months, but it's huge with tons of character.  I'll need to look at some more places before I make a decision, but it helped tremendously to have him here for at least one walk-through to see what our individual reactions were to a city apartment space. So far so good.

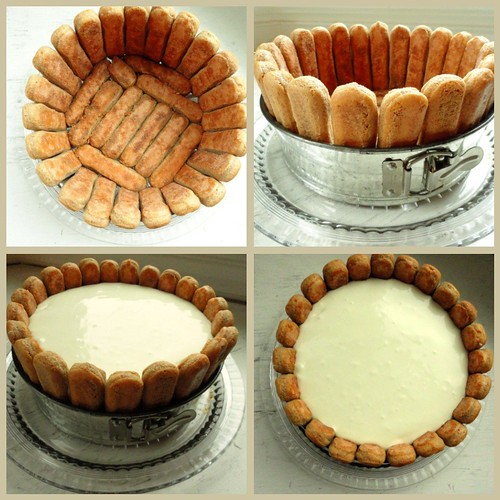
On Saturday, some friends of ours hosted a fabulous dinner party in their gorgeous home. I made Tiramisu (recipe courtesy of Cook's Illustrated, subbing sweet marsala in for the rum) and was worried the whole thing would crash into a big pile of espresso/marsala-soaked ladyfingers and mascarpone cheese when I removed the ring, but it held together just fine.

Tiramisu prep


DSC00999

Monday, February 14, 2011

surprise!

Dennis the Menace (best boyfriend ever!) surprised me with a trip to Vegas to see Flogging Molly at Mandalay Bay, March 18. wooooo! That's the top news of my week & it's pretty awesome. Still slowly moving along on the self-drafted skirt. I'm into the hand-sewing phase now & after that it's the ever-loving hem. I need to dedicate a few evenings to finishing it up but there just isn't a whole lot of time. Or I should say that by 8:00pm when I could be hand sewing, I'm just too damn tired.

Oh yes & I finally got a pizza stone- for $20. I've wanted one for awhile, so I could start doing some different kinds of bread. I tested it out this weekend by making totally the wrong bread for a first shot with a new pizza stone. I made a high hydration dough. I really had no business doing that at this juncture in my bread baking career. And I most certainly did not have any business whatsoever trying to shape the high hydration dough with nothing but my 2 hands & a couche. But hey my m.o. is go big, fail big - because maybe you'll succeed & if you don't, well then things can only go up from there.

Saturday, January 01, 2011

Morning Buns.

DSC00730

Sewing suffered for these Morning Buns. Not a good decision, particularly because I was less than thrilled with the results.

Sunday, November 07, 2010

Pumpkin Spice Bagels (Without a Bread Machine).

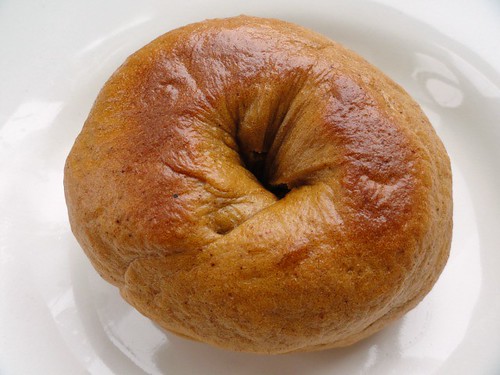
pumpkin spice bagel

Oddly enough, there's almost a total lack of pumpkin bagel recipes to make by hand out there. It's mostly bread machine recipes and from the looks of it it's just 1 bread machine recipe from a recipe site that has been tweaked ever-so-slightly by various people.

I don't have a bread machine and maybe I could've just used the bread machine recipe and done the proofing, kneading, etc. by hand, but I really liked John D. Lee's recipe so I attempted to adapt that one into a pumpkin spice bagel recipe. The kind you do by hand, not by bread machine.

Totally flying by the seat of pants here - John's recipe calls for 1 1/4 - 1 1/2 cups water and because pumpkin puree has a lot of water in it, I decreased the water content to 1 cup and used 1/2 cup puree. The bread machine recipes are for 3 cups of flour and John's recipe uses 4, so I pulled the brown sugar and spice amounts from the bread machine recipe(s) figuring my bagels, with the added cup flour, would be slightly less spicy and sweet which is what I wanted.

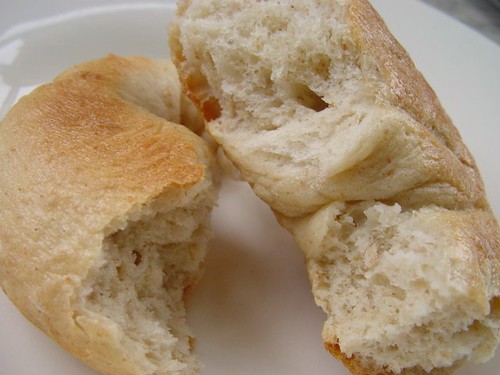
That's not what I ended up with because I mistakenly used the 1/2 cup measure for the brown sugar instead of the 1/3, and the spices were still too much. I ate one for breakfast this morning with a soft boiled egg & the bagel ran right over the poor egg. They're still quite delicious though, but in a holiday dessert kind of way.

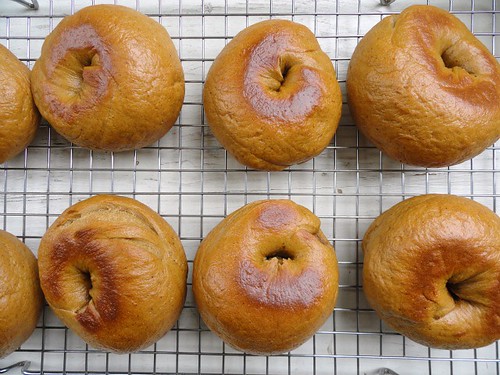
One more thing to note - unlike the whole wheat bagels, the pumpkin bagels didn't seem to puff at all during the 20 minute rest & they sunk right to the bottom of the kettle of boiling water. It took just a little nudge with a slotted spoon to get them to float back up to the top but I was a little concerned they were going to bake up like dense bricks.

Everything turned out fine, though. They puffed up a little in the boiling water & got a nice spring in the oven, baking up nice and fluffy with a light crumb.

pumpkin spice bagels

So here's my adapted recipe, modified for less spice:

Pumpkin Spice Bagels
adapted from Homemade Bagel Recipe by John D. Lee

Proof:
2 tsp active dry yeast
¼ cup warm water
pinch sugar

Combine:
4 cups bread flour
1 ½ tsp salt
1 ½ tsp cinnamon
1/4 tsp freshly grated nutmeg
1/4 tsp allspice
1/4 tsp cloves

In a stand mixer bowl with dough hook, combine proofed yeast, flour mixture and:

1 Tbsp oil
1/3 cup packed brown sugar
½ cup pumpkin puree
3/4 cup warm water

Knead with dough hook for 10 minutes.

Turn dough out onto silpat. Very lightly dust with flour and knead lightly. Cut dough into 8 pieces. Cover with plastic wrap and let rest 10 minutes.

Follow the rest of John's instructions for rolling the bagels, resting, boiling, draining & baking.
DSC00658

Sunday, October 24, 2010

bagels!!!

whole wheat bagel

These deserve a few !s because they're bagels! & they were easy! & they turned out great!

There are a ton of bagel recipes out there, but this one by John D. Lee is dead on.  Check out the short video clip at the end of his post that shows you how to roll them. And you really do get better as you go along. Here's the tray pre-rise. First attempt lower left, second attempt upper left--

DSC00573

Here they are after a 20-minute rise. A little puffy & ready to go in a kettle of boiling water

ready for boiling

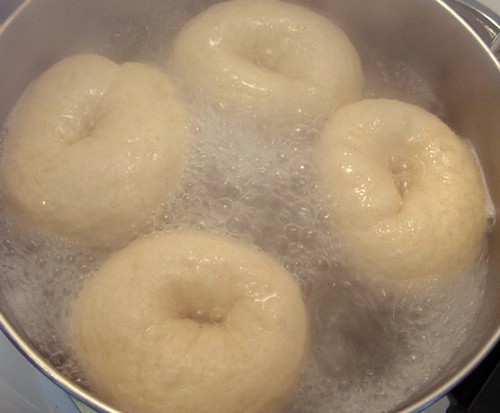
Boil 1 minute per side

boil 1 minute per side

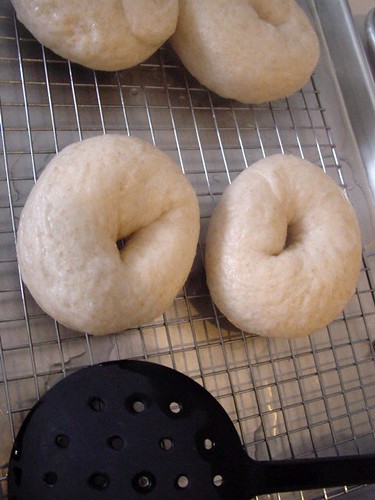
Drain 1 minute

drain for 1 minute

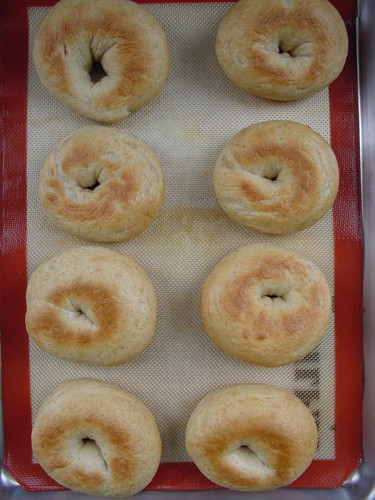
Bake at 425 for 10 minutes, flip them over and bake for another 10 minutes.

Bagels!

bake 10 minutes per side

bagel crumb

Notes

  • I subbed in 1/2 cup whole wheat flour for 1/2 cup bread flour in John's recipe
  • Prepping for the rise - place rolled bagels on parchment, not silpat. After they rise you have to transfer them to your kettle of boiling water and they come off the parchment a lot easier than the silpat. I covered with plastic wrap & you can spray it with some cooking spray or not. Either way, the plastic wrap came off very easily without taking any of the bagel dough with it.
  • Have a rack/sheet pan & slotted spoon ready to drain your bagels after you boil them.
  • When moving them from parchment to boiling water, just flip them over into the kettle. They'll be upside down for the 1st minute of boiling & right side up for the last minute of boiling.
  • When you remove them from kettle to drain on the rack, use a slotted spoon & place them right side up on the rack (you will get rack marks on the underside).
  • Drain for 1 minute & move to sheet pan. Instead of oiling a sheet pan, I just baked them on a silpat.
  • Bake 10 minutes per side at 425.

That's it!

Sunday, October 17, 2010

No-Knead 100% Whole Wheat Bread

Fall has finally arrived.  It was a chilly weekend with rain today, so I decided to make some bread.

I wasn't feeling that industrious, so I chose King Arthur Flour's No-Knead 100% Whole Wheat Bread, which requires the bare minimum in preparation. Simply throw all of the ingredients into a mixing bowl, mix with your beaters on high speed for 3 minutes and then scrape into a loaf pan and let rise for about 90 minutes-

90 minute rise

- just until the loaf crests over the top of the pan.

crest

Bake at 350 degrees for 45 minutes, rest in pan on a rack for 5 minutes and then turn out of the pan.

Because you're scraping a very soft dough into the pan as opposed to kneading and forming a loaf that you place in the pan, the finished product isn't the most attractive loaf I've ever seen. I did try to smooth the top a bit (because I couldn't stand it) but it's still a little raggedy.

no-knead whole wheat bread

It looks much nicer on the inside

whole wheat bread

No-Knead 100% Whole Wheat Bread

Notes
  • used Irish butter left over from...something, I can't remember what
  • whole milk instead of water + nonfat dry milk.
  • for the sweetener - maple syrup
  • 90 minute rise time
  • 45 minute bake time

In the reader comments on the KAF blog, someone mentioned the bread was a little salty, and someone else mentioned that using maple syrup left a slight maple flavor but added no sweetness and I have to agree with both of these comments. Next time, I'll try 1/2 or 3/4 tsp salt and use honey instead of maple syrup.

The bread is nice and soft and although the crumb is pretty dense, the loaf is still very light and you don't feel weighed down by eating a slice.

I'll definitely make it again. It's a nice little loaf and very easy to put together.

100% whole wheat bread